
")
Talking to indie devs, the topic of backing up game projects often comes up. They know they should, but they don’t know how or it seems too complicated. I was there too, but since I started using GIT, I never want to live without it. So I thought I’d write a GITting started guide (sorry). This isn’t by any means the way to do it, it’s just what I’ve found to work best for me.
STEP 0: What the hell is GIT?
GIT is a ‘version control’ system, a way to back up files to the cloud and make collaboration easier. It’s kinda like Dropbox, but unlike Dropbox it allows you to write a description each time you do a backup so you know what you did and when. This makes it easy to roll back if you break something in the game, and see exactly which files you affected with your most recent changes. It also handles conflicts a little more gracefully than “THIS IS THE NEWEST VERSION DERP”.
You need three pieces to make GIT work for you:
- A project folder on your own computer
- A ‘repository’ (which is a folder in the cloud that stores the back-upped files)
- An app to keep the two in sync
STEP 1: Make a folder on your computer
This first step isn’t strictly necessary, but it helps with staying organized: make an empty folder somewhere on your computer, called “git” or “repos” or “gamedev”, something like that. This folder will be the new home for all projects that you want to back up with git. But don’t put anything in it just yet! It has to be empty, so don’t use an existing folder either.
STEP 2: Create a repository on Github
Next, you’ll need to make a repository for the project that you want to back up. For this you’ll have to register a free account on a website like Github (or Bitbucket or Gitlab – They offer practically the same service, though I recommend Github as it is the easiest in my opinion).
Once you’re logged into Github, click the New repo button on the left. Give it the name of your project, make sure that you check PRIVATE REPO (otherwise ANYONE can view and download the files you store) and under the git ignore dropdown, select Unity (or whichever engine you use). We’ll talk about the .gitignore file later. Then click Create!
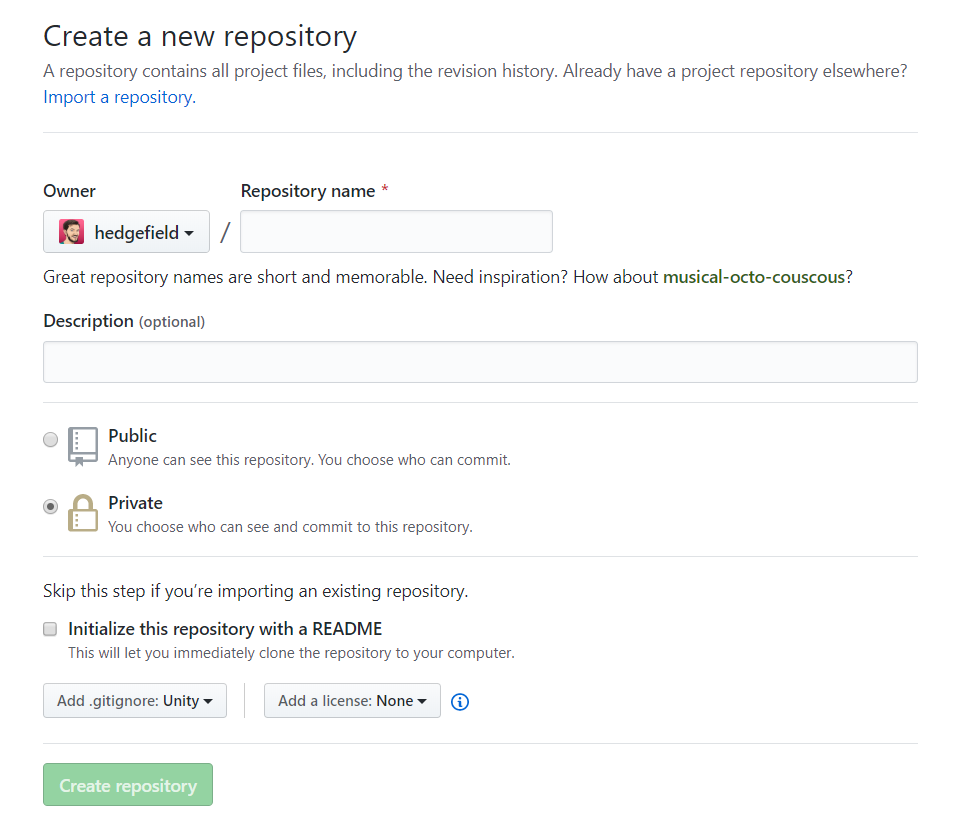
After that you should be looking at your repo dashboard. You won’t need to be in here very often, so you can close this browser tab.
STEP 3: download the Github Desktop app
Next, download and install the Github desktop app. We will use this to sync your new repo to your computer.
STEP 4: Clone the repo to your computer
The repo you created in step 2 currently only exists online. We want it to also appear on our computer. That’s what we will do now.
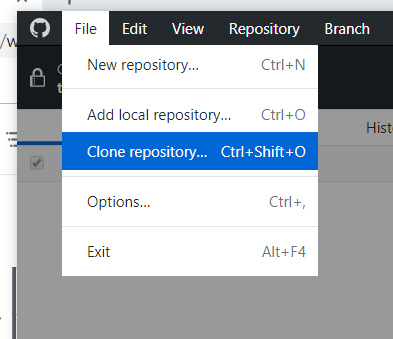
Launch Github desktop and log in with your Github account. Now click File > Clone repository.
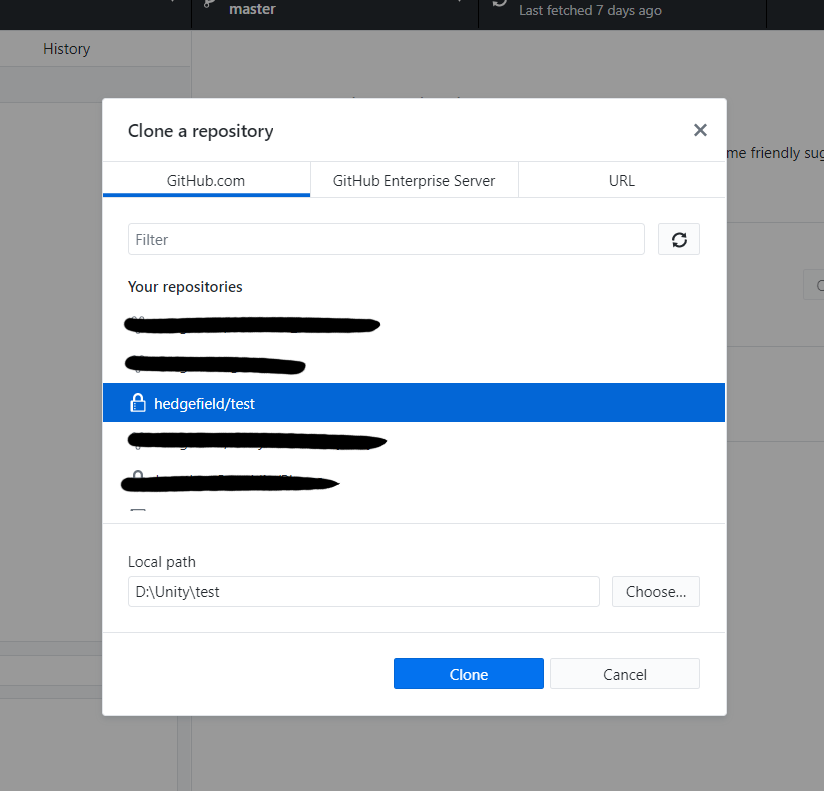
In this list, you should see your new repo. Select it, then click the Choose button next to the Local Path field, and select the empty folder you made in step 1. Github Desktop will automatically create a new folder in there with the name of this repository.
For example, my gamedev folder is called “Unity”, and if I were to clone my “test” repo into it, the local path would read D:\Unity\test.
Click Clone, and soon your repo should be synced to your computer. Open it by clicking Repository > Open in Explorer/Finder at the top of Github Desktop.
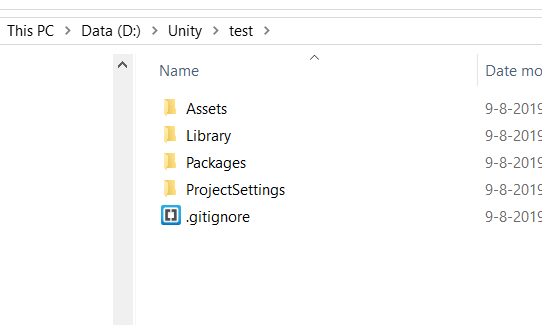
Now you are in your new project folder. It will be empty except for the .gitignore file.
SIDENOTE: The .gitignore file
The .gitignore file tells GIT which files it should NOT back up. This is extremely useful as it prevents a lot of unnecessary files from confusing you and bloating your repo.
For instance, Unity creates a ‘Library’ folder in your project folder, which is completely unnecessary for a backup. It IS useful that it exists, sure, it’s a cache that makes opening your project faster, but to back that up would be a waste of time and space, because if you delete it, Unity will just regenerate it next time you open the project.
If you are using Bitbucket or another version control system, you can grab the gitignore file from https://github.com/github/gitignore.
STEP 5: Adding your project files
Now it’s time to add your project files.
- If you have an existing project, navigate to its folder, press Ctrl/Cmd+A to select everything, and move those files into the new repo folder we just cloned.
- If you are creating a new project in your game engine of choice, simply select the repo folder as the project location.
STEP 6: Syncing local and remote
Now take a look at the Github app again. You should see a list of new files on the left.
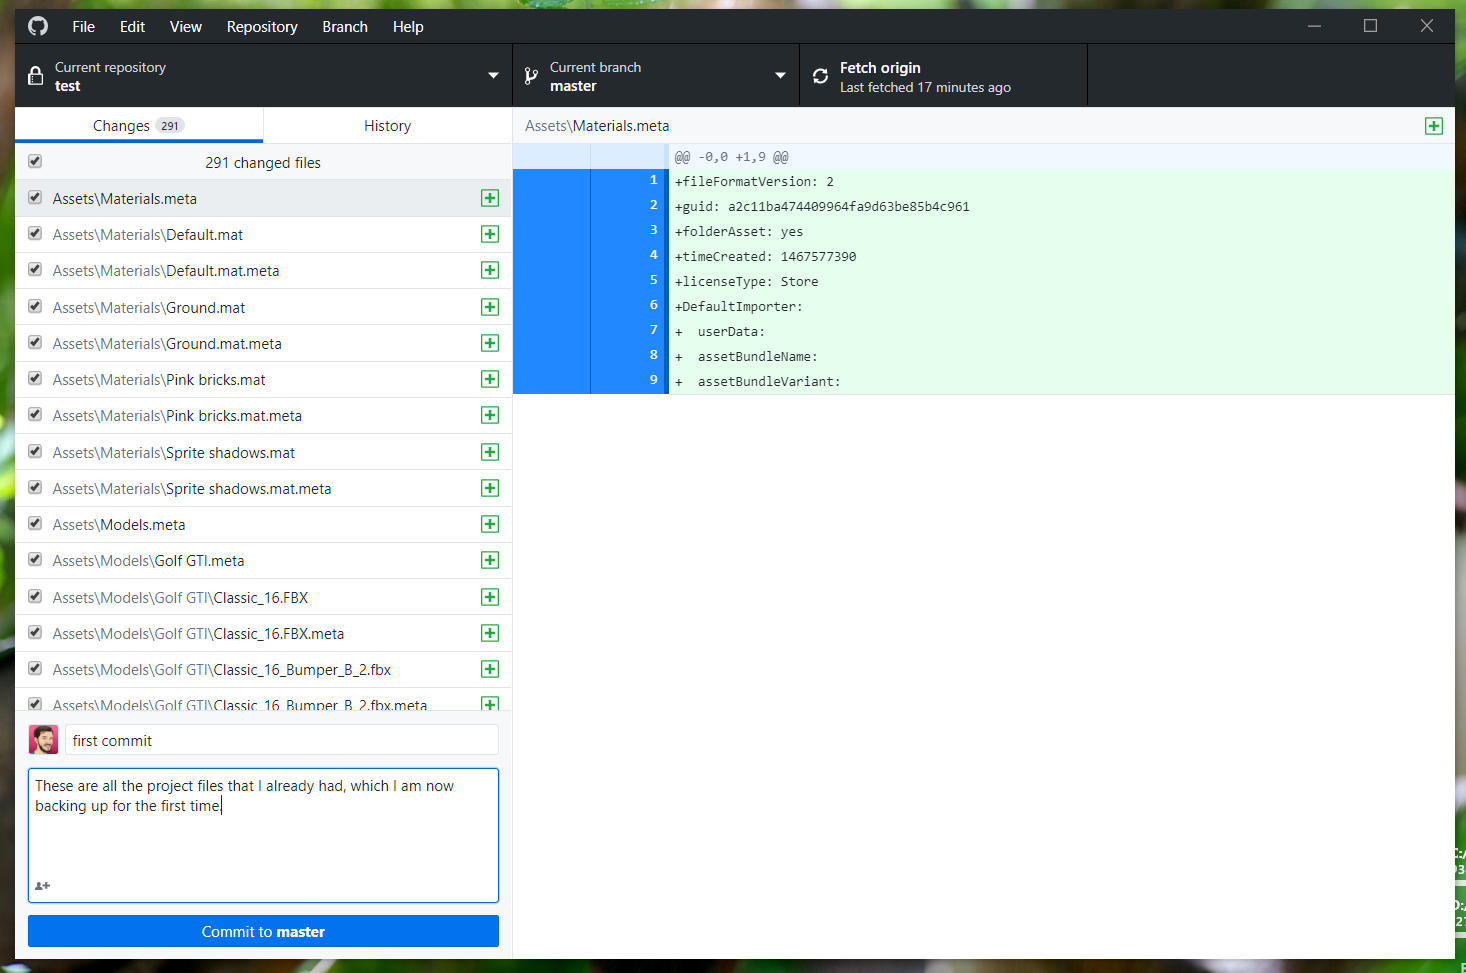
These are local changes. They show what is different between the repository on your computer compared to the online repository at Github. What we will now do is upload these changes, by what is known as making a commit.
Type something like “First commit” in the Summary field, press Commit to Master, WAIT FOR THE LIST TO CLEAR (which means the commit is ready), and then press Push origin in the top right.

Congrats, you just backed up your first file! Now you’re in business.
IMPORTANT: making a commit prepares your changes for upload, but ONLY when you click Push are they actually uploaded to the repository.
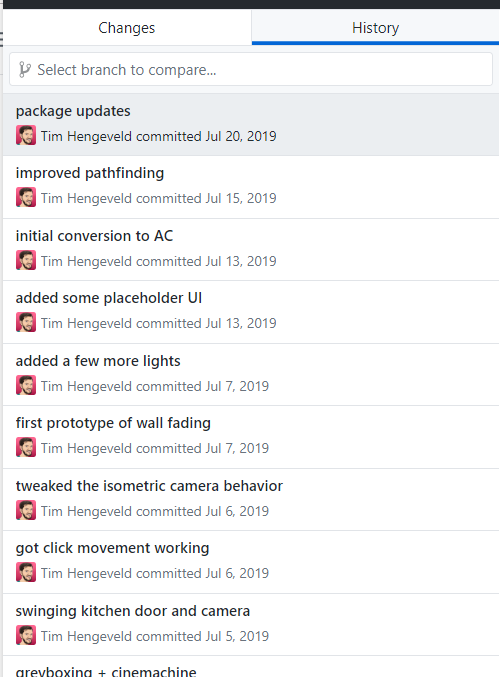
SIDENOTE: when to commit
It’s generally good practice to make a commit after each feature or task is completed. Think of it as the changelog of your project.
For example, let’s say you changed the main character’s shirt color to red. The file that contains the shirt color will appear in the list of changes in Github Desktop. When you commit that file, it gets saved to your repo. If you then change the shirt color to blue, you have to make another commit, that’s a second entry in the repo history. So if you look back later you can see “oh yeah I changed it to red but decided blue was better.”
And if you decide “well, blue was okay but I liked red better”, you can revert your project to the ‘red’ commit – Okay in that case it’s probably easier to just change the shirt color again in the editor, but you get the idea. Reverting a commit is useful when you made so many changes you can’t undo them manually, or if you deleted files you shouldn’t have).
ADDENDUM: OH GOD WHAT DID I DO?
You shouldn’t really ever run into problems if you’re the only one working on the project, but sometimes things can go wrong. And with a team, it gets a bit more complicated still. So here are a few tips to avoid BAD TIMES.
- Try to only commit things that work. You don’t want to leave the next person with a mess to clean up before they can do their thing (even if that person is you).
- If you work on a project across multiple computers, ALWAYS sync first before you start working. This is called “fetching and pulling”. It’s the same button as pushing. I’ve forgotten to do this sometimes before making more changes and ended up with a file version conflict. YOU DON’T WANT CONFLICTS. Same goes if one of your teammates made changes overnight that they maybe didn’t tell you about. Which leads to the third tip:
- When working with multiple people, make VERY CLEAR agreements on who works on what when. If you both work on the same level, even if they did prop placement and you did collision boxes, you’ll get a conflict because there are now two versions of the same asset. Only code changes can be merged together, but that’s still a pain. Just try not to do it.
- If you really want to try something radical or hack out a feature that will likely break the game for a few days, make a branch. A branch basically isolates changes into a separate ‘timeline’, so the original can remain stable and working. You can merge the changes back into the master branch later when everything is bug-free. I won’t go into detail on this, there are guides out there that explain it better than I can.
- If you get a merge conflict: good luck. Debugging those is a pain. But I can share One Weird Trick that can save your skin: if you tried to push files that conflict with their remote versions, GIT will usually barf everything back in your face and it can be hard to decide what to do next. In that case, you can undo your commit. Click Repository > Open in command line/Terminal. Then type git reset HEAD^, and now all your changes should be back the way they were, and you can uncheck the conflicting ones before committing again. Then you can choose to discard the remaining problematic local changes or push them to overwrite existing remote files.
For more in-depth troubleshooting I recommend bookmarking this page https://sethrobertson.github.io/GitFixUm/fixup.html
Now you should know everything to practice safe GIT! Good luck!
If anything was unclear or you’re missing something, let me know and I’ll update the guide. Maybe I’ll make a Youtube video out of it eventually if people want that.